Niagara Particle Morphing
One Small Step into the new Niagara System.
Many of us have taken on the task of creating a formative blog on developing some next-generation video game art to be rendered real-time as a project for both our own development and the development of the skills of the visual effects communities online. I wanted to start this journey into new and exciting systems by looking into the new Niagara System within UE4.
This system is Epic Games next step toward artistically driven particle VFX within games. This is a statement directed towards the giants of this sector such as Houdini who have cornered the market with amazing and well-optimised systems for this kind of generation for a long while at this point and is designed to eventually take over from the old Cascade system implemented at the dawn of Unreal Engine 4. Before looking into the new system, let's take a look at some of the differences between this system and the old one.
While both Cascade and Niagara can be used to make visual effects inside of Unreal Engine, using Cascade to create and adjust visual effects is vastly different from how you use Niagara to achieve the same results. This new tool puts more power into the hands of the technical artist, to create additional functionality without the help of a programmer. They have clearly taken some inspiration from movie FX tools and are trying to make the system as adaptable as possible while keeping usability high and accommodating 90% of use cases.
The power of Niagara lies in the ability to share arbitrary particle data in whatever way the user chooses. This enables me, as a technical artist, to script my own behaviours, rather than requiring code intervention to create new features. In Cascade, particle simulations are controlled by hard-coded modules, with each providing a specific set of functions to modify particle attributes. In contrast, Niagara simulation is controlled by node graphs that we can create and edit.
So, What to try first?
As the system is still not officially released and is technically in beta, it is close to impossible to find tutorials though there is some work to look at. I looked into some experimentation with this system for a little while before making a decision to do some CPU particle manipulation and experiment with vector targets and scripting. While looking on the Visual FX discord channel at other users who have been trying out the new system, I was able to find a gif of someone using a morph target to have particles appear to explode around a mesh and fit the contours of it perfectly. The particles within this showed a shape explode into a mass of tiny particles and reshape after a few seconds into another shape.
This is what I used as inspiration for the Niagara system I would code.
The first thing to do was to create a new and empty C++ configured UE4 project. from this, I will be able to construct all of the needed components for the final system. I made sure that I did not have starter content as this would needlessly bulk up the file size. As can be seen above, I also took the time to create the Niagara System (where all of the components are held) the Niagara emitter (the math and logic that drive the particles) and the three dynamic input scripts (the parameters of the math and that values used to build the code) named Update 1, Update 2 and Spawn.
next lies the first issue I had with this test. I knew that I needed the Update modules but was unsure on how exactly to construct them. I searched through the Niagara notes from Epic Games but as it is unreleased these were not very helpful. Luckily for me, I had noticed an update to the UE4 examples pack and I now had something to work from.
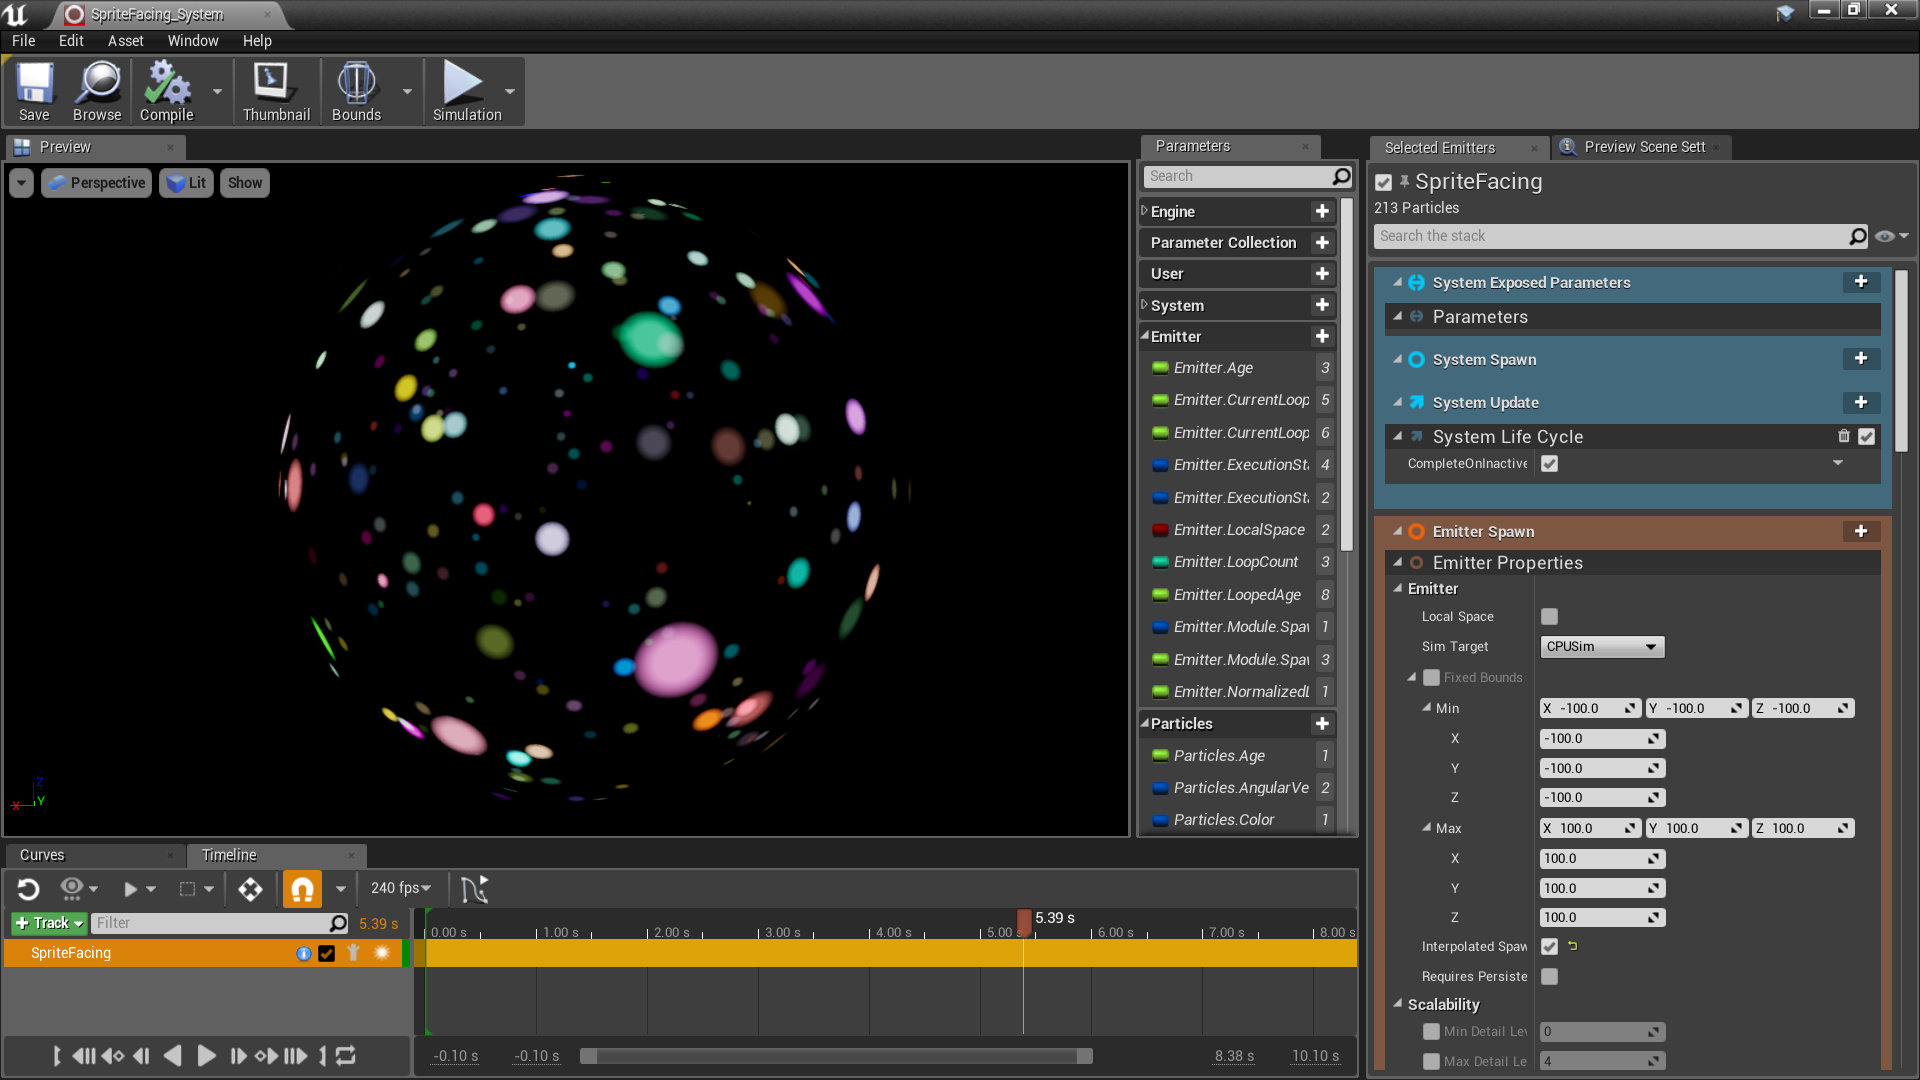
Here I am showing one of the examples that Epic had released with this new update for their pack. This system, in particular, is actually meant to be a showcase of the way they have managed sprite directional coordinates but they had also used vector parameters to drive the sprite location. PERFECT!
Now that I knew how to set the maps for the particle vectors, it is a simple process to take some static meshes (I am using a sphere and a cube that are primitives from Maya), set them as variables for the different classes to send to each other and compile the spawn as a generator within the emitter class.
So, What do I need to do now? Well, now that I have the shapes stored as data there is only the morph between them to do. This is something that can be done simply by letting the particles flow from one spot on the first shape and instantly take a new form with the next saved mesh. But I want to see more than that. I will be going for something a little more interesting to look at here.
The next stage of development will be programming in some sort of explosion. We can do this by setting a noise parameter. Noise is a simple calculation that creates numbers in a randomised pattern. this can be used here to drive the forces behind the particles and give them the appearance of randomised movement.
the Curl Noise Force parameter allows for all of this math to be done simply by entering some arbitrary values. Here you can see that I decided against using a solid value and instead opted for a graph based system to calculate the value. This is for two reasons:
- Because I want the particles to hold the shape for a little while before exploding.
- Because I wanted to have two explosions. This is one to explore the original shape into particle and the other to explode the next shape.
So, now the bulk of the work is done! We have a shape that is spawned followed by an explosion, then the particles stop and travel to a new point in space to form a new shape and finally repeat the process to get back to the first shape. But we're not done yet! This is technical ART, isn't it? Let's see if we can make this even more appealing. The graph-based system is great as it allows for values to change on command and also to stick to a value curve that is already set out. Now that the particle system works, let's take a look at the colour and see if there is anything to do that may make this even more visually appealing.
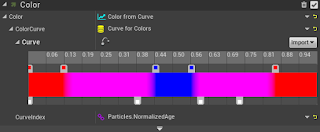
Here, I have taken the graph system and made it into a three value graph. This can be used for vectors (if using the values as X, Y and Z) but here we will be using them for colour (R, G and B). Using this graph the colours will now start at an emissive red, move through purple to a deep blue and travel the same route back to red to complete the cycle. This is timed to flow perfectly with the explosions and the reforming of the particles and ads to the artistic illusion of change within the particles.
Finished! The gif at the start shows the final results of this new system and it is definitely an inspiring start to use this new system. As a footnote, I wanted to point out some issues and some things that I would have liked to have done differently. The particles do not return to the exact same point, they only return to the same shape. This makes it all impossible to loop as there is jitter at the start of each cycle. I would have to do a lot more research to create a formula that could store all of this information but for now, this will do. One last this is that this runs on the CPU. Although 1,000 particles is a lot and almost any device could handle this, It could certainly be optimised if it was instead cached onto the GPU. a future project, maybe?
Next time, Some crazier technical art experiments.


Comments
Post a Comment